Introduction
This tutorial will show you the rough placement and effects that you will need for each of the lights. Aim for creating the correct effect of each light (key, fill, and back), not duplicating the settings in this tutorial. The exact settings and placement of your lights are not that important as they will change from project to project. Each light produces a certain effect. Having three lights doesn’t make it a 3-point lighting system. Your lights need to do the correct things. Adjust your lights as needed to get the desired effect. 3-point lighting is used for lighting a single subject, not a scene or multiple subjects. So, choose a single object to focus and light. Don’t try to light a scene or multiple objects. Different lighting schemes are needed for those situaions.
3-Point Lighting Rationale
The computer screen provides a two-dimensional view. When exporting your image or viewing it without being able to rotate around the object, you need to make sure the viewer can see the 3-dimensionality of your work. 3-point lighting makes this possible.
1-Point Lighting
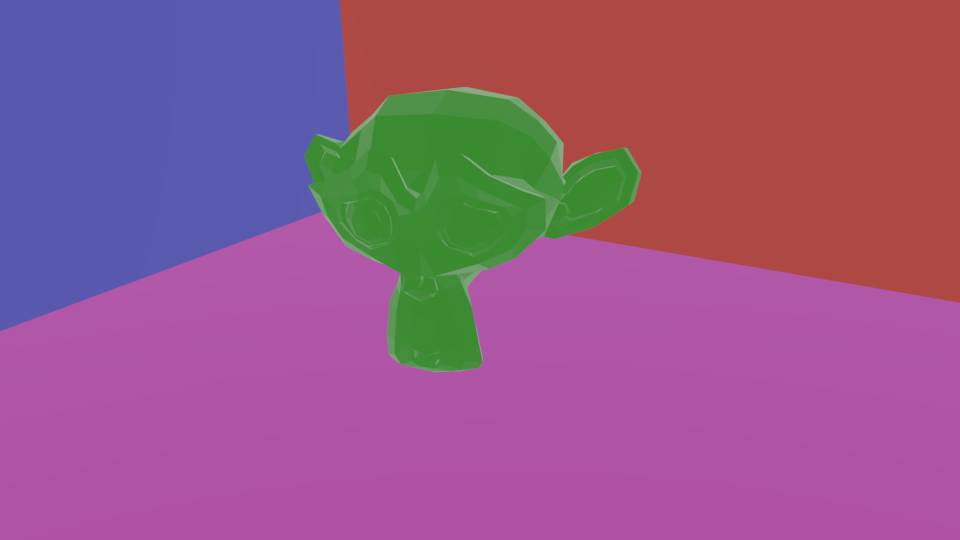
This is Suzanne with a single light, the World light. It looks like a flat, 2-dimensional object. You cannot see any depth to Suzanne nor tell how far away she is from the background.
3-Point Lighting
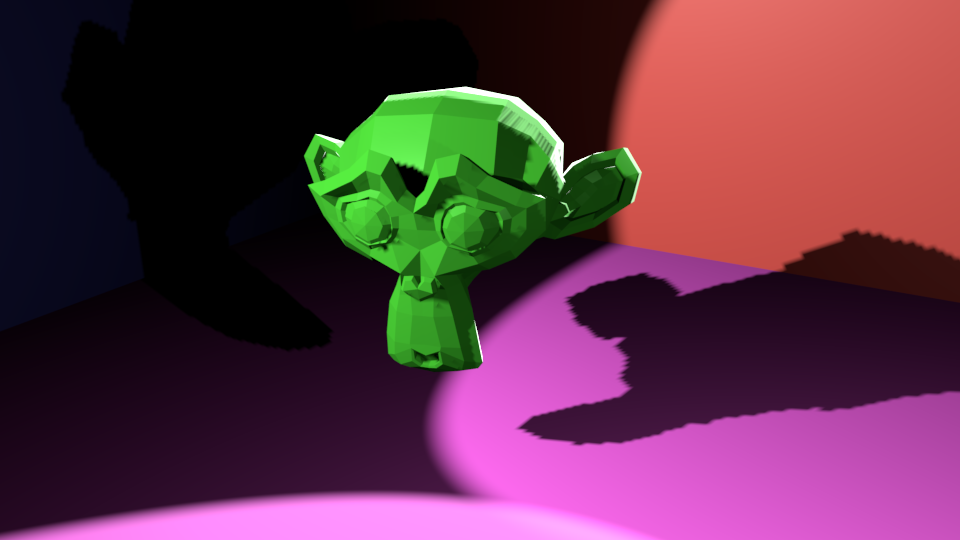
This is Suzanne with a 3-point lighting system. You can see the 3-dimensionality of the Suzanne, You can see eyebrows, the roundness of the head, the depth of the eyes and ears. You can also tell how far back the background walls are from her. You have a much better sense of the 3-dimensional world of your work without needing to rotate around Suzanne.
Object Choice
Choose an object for this project that has a lot of 3-dimensional depth, like Suzanne, the monkey head object. Spheres, cylinders, cubes, and flat objects (like swords), are not good for this project as they don’t produce very good shadows when lit and are difficult to light properly.
Key Light
The key light is the main light source. It should light your subject well so you can see the 3-dimensionality of the object. Push the intensity of the light up so that the object is well lit, but not too well lit where you are blowing the object out and it is turning white. Also, view the object at an angle (like 90 degrees) from the key light in order to produce shadows. The key light should produce dramatic shadows, almost half of you object should be black and in shadow. On its own, the key light produces very dramatic lighting. I prefer spot lights for the key light as they are more directional and provide more dramatic lighting. Pint
Key Light Only
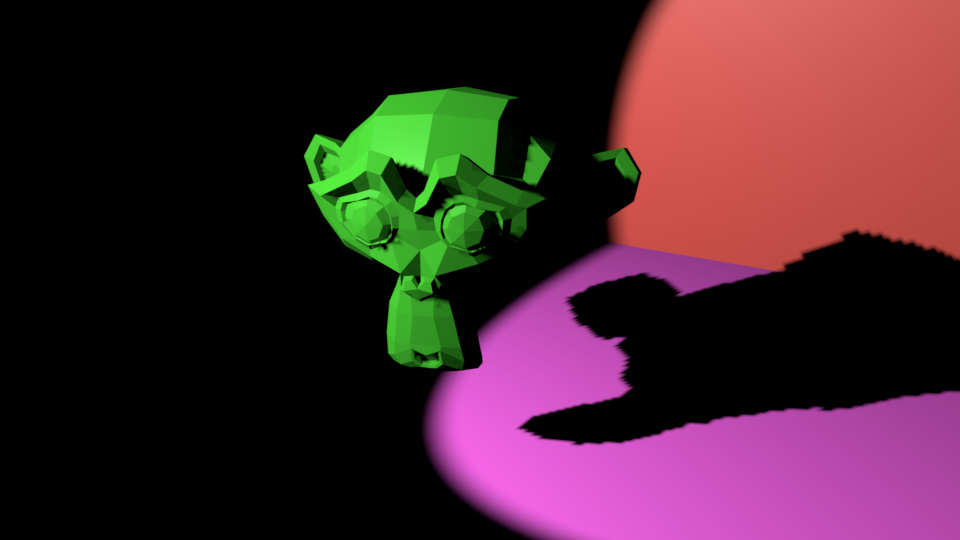
With only the key light, you can see the roundness of the head and the depth of the eyebrows, but the whole right side is lost in shadow. Without the backlight, you also just have a floating head. You cannot tell how far back the walls are from the object. I used a spot light to produce the highly directional lighting with a power of 5,000.
Key Light Placement
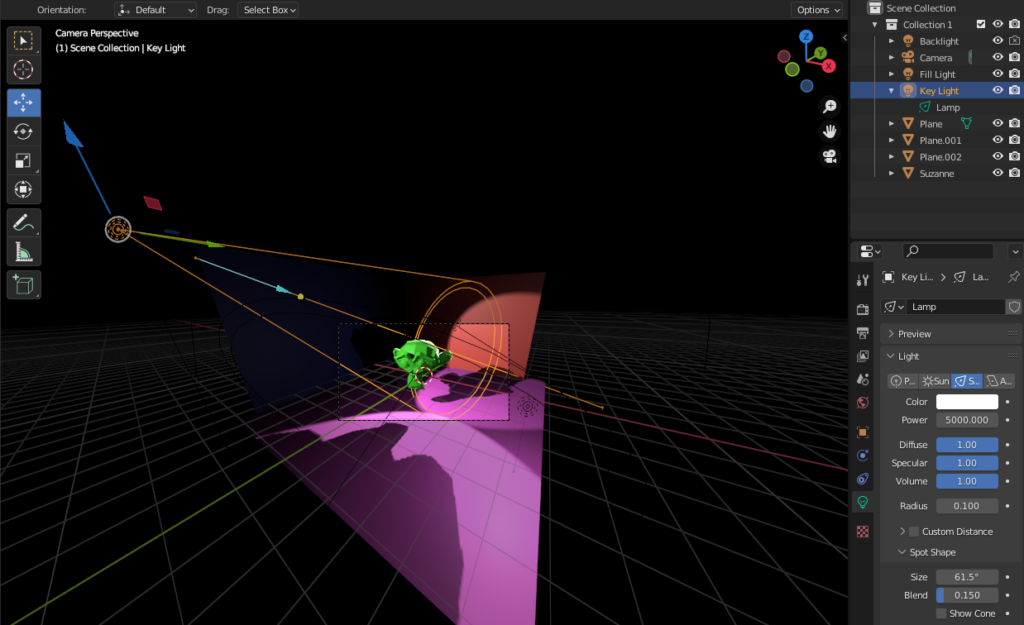
The key light is placed slightly above and at an angle from the object and the camera (or viewing area). This allows for the production of dramatic shadows which give the object depth. If you view the object from the position of the key light, your object will appear flat and 2-dimensional because the lighting is flat.
Camera Placement or Viewing Angle

Place or your camera or view your object from off-angle, not straight ahead. For Suzanne, I am viewing her from slightly above and to the right. Viewing from this angle allows me to see the top of her heard, the roundness of her head, and the depth of the eyebrows. Viewing her from straight-on makes her appear flat, with no depth. The key light is placed at about a 90 degree angle from this view to produce the shadows. This image has all three lights turned on.
Fill Light
The goal of the Fill light is to fill in the shadows produced by the Key light. It fills in the shadows, but it does not get rid of them. It should be much softer and more diffuse than the Key light and should not compete in brightness. The shadows should be filled in so the details in the shadows comes out, but the shadows should still be there to provide that 3-dimensional depth.
Fill Light Only
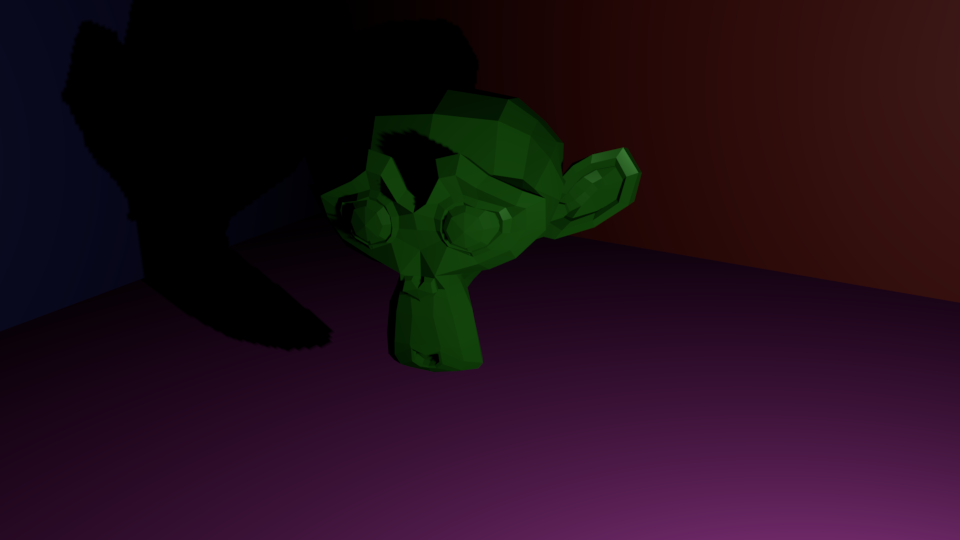
With only the Fill light, you can see the 3-dimensionality of Suzanne, but it is much less intense and dramatic. The light is directed at the shadows produced by the Key light on the right side of head. I used a point light to produce a much more diffuse, softer light. The light has a power of 150 vs 5,000 for the key light.
Fill Light Placement
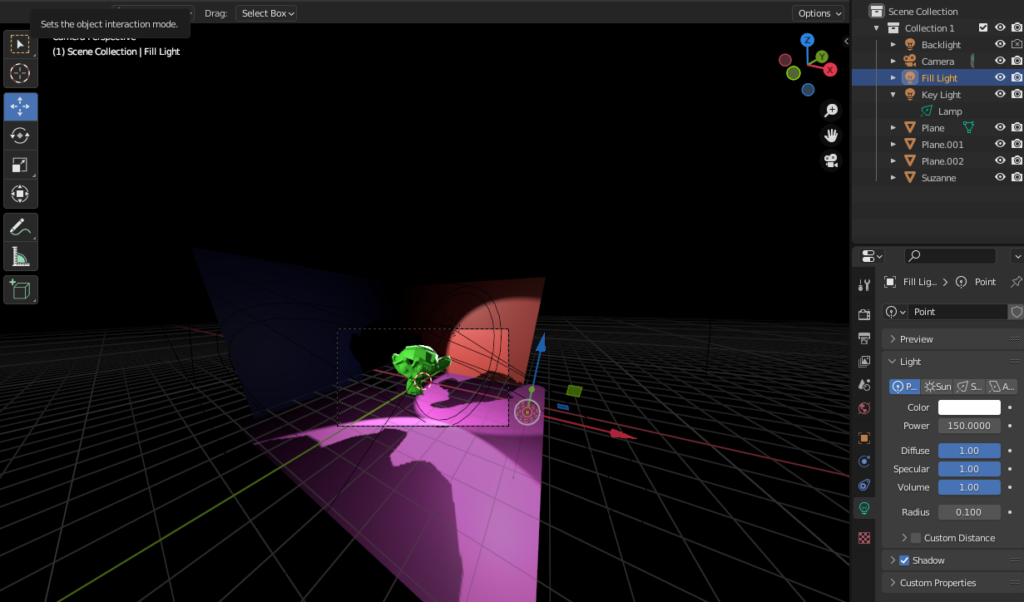
I positioned the Fill light a little bit lower than the head and to the right of Suzanne in order to hit the shadowed areas produced by the Key light.
Key Plus Fill Light
Key Light Only

Key Plus Fill
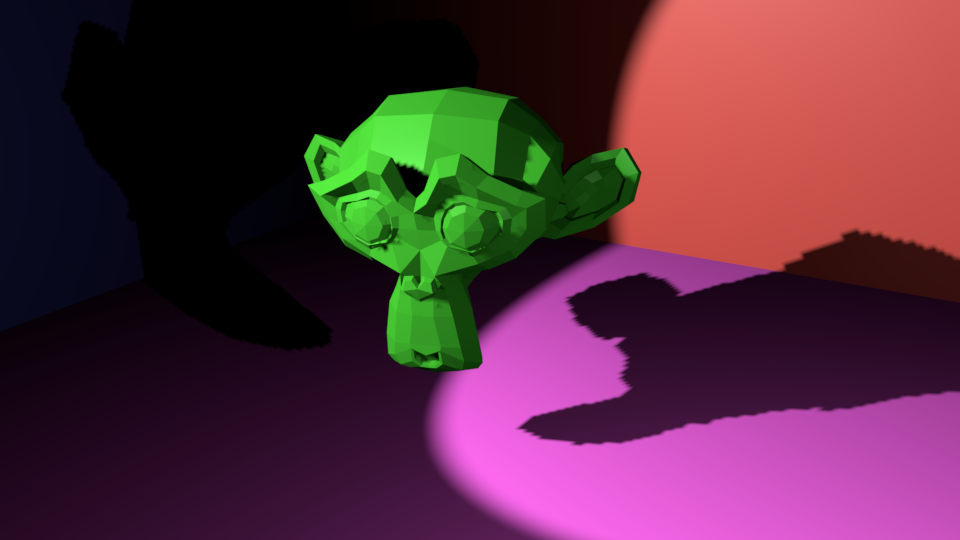
With the Fill light on, the black shadowed areas to the right side of Suzanne are filled in and you can see the detail of the ear and side of the head. The right side of the head is still in shadow and much darker than the left side but not completely black and void of all detail.
Back or Rim Light
The goal of the Back or Rim light is to separate the object from the background and to provide depth with the other objects. It is the brightest light in the scene, so bright that it will blow out the object and turn it white. It is positioned, though, to hit the object from behind. It should produce a white rim of light around the back of the object. Spot light work well as back lights as they are directional and can be pointed such that they don’t blow out the whole scene because they are so bright.
Back Light Only
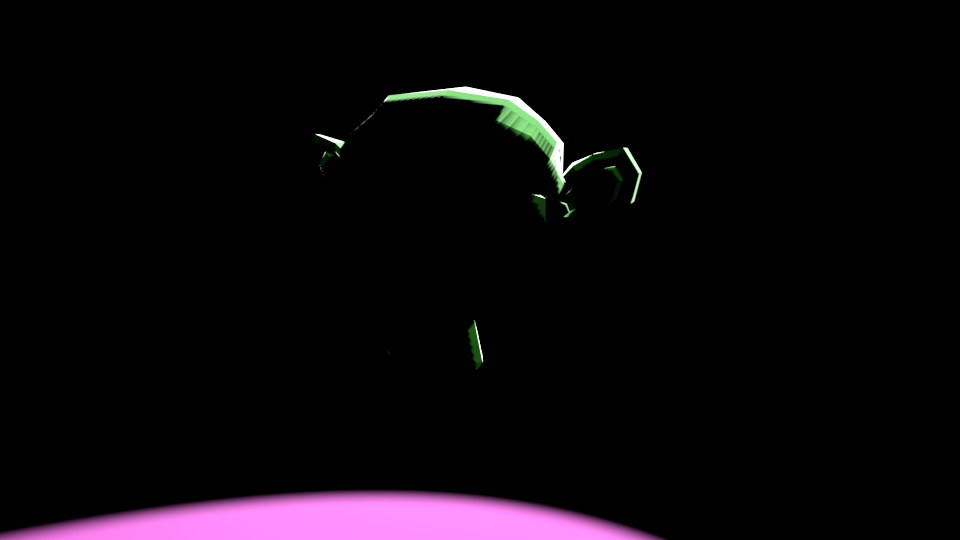
With only the Back light, you only get a rim of light on the edges of Suzanne. It is the creepy, horror-movie lighting. It is so bright that it turns the green of Suzanne to white. I used a Spot light with a power of 50,000 (10 times the key light). The directional Spot light prevented this bright of a light from blowing out the walls around Suzanne.
Back Light Placement

The Back light is directed at the back top of the head in line with the camera or viewing angle.
Key Plus Fill Plus Back Light
Key Plus Fill Light Only

Key Plus Fill Plus Back Light

With the Back light on, the rim of light of the edges of Suzanne help separate the ears and top of the head from the background and give the scene a better sense of depth.
World Light
To better view your lighting, it is a good idea to turn off the World Light. The World Light is a light applied to the world around blender so that you can see things in rendered mode if you don’t have your lights set properly. It is on be default and can mess with your 3-point lighting. To turn it off go to the World Properties palette and set the Strength to zero. If you don’t have lights se properly, things will go completely black. So, watch out.
